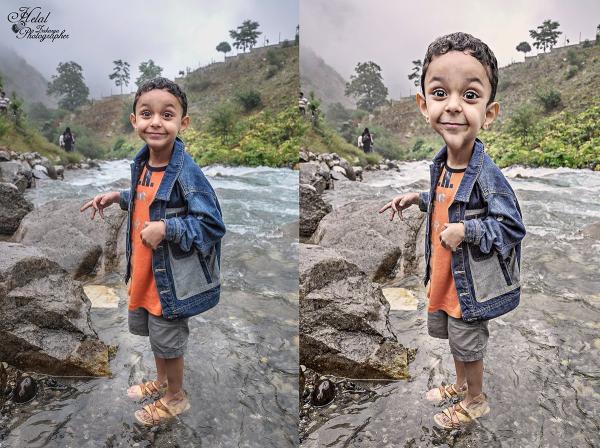
Caricatures are a fun alternative to traditional portraits. The idea is to comically exaggerate particular features to create a humorous representation of that person. Adobe Photoshop's transform, warp, and liquify features are perfect for creating caricatures from a photographic portrait. This tutorial is part of a larger set of instructions found in the Tuts+ course, Fluid Photo Manipulation: Transform, Warp, and Liquify.
Tutorial Assets
This tutorial requires two files. Both are available through the Download Attachment link found with this tutorial. The files you will need are:
- A portrait photo. Feel free to use one of your own, or use the same one I used.
- A textured background. I created this one using the Adobe Texture Paper Pro extension.

1. Basic Photo Preparation
The essential technique for creating a caricature is to find elements that are already naturally pronounced, and exaggerate them to a comical degree. In our starter photo here, the young man's jaw line is rather large, and his smile is very prominent. The horn-rimmed glasses are noticeable and the hairline looks like it's beginning to recede. These are all aspects of his portrait we can have fun with.

Step 1
The solid white background of the portrait makes it easy to extract the figure from the background. Use the selection technique of your choice—I used the Quick Selection Tool (W) to craft the selection—and then go to Layer > New > Layer Via Copy (Control-J) to create a cutout layer of the man.

Step 2
It's much easier to work with particular features if they are isolated. So use the same technique to cut out the following individual elements. The body and clothing layer should follow the neckline of his shirt.

The head/neck layer should fit nicely inside the neckline of the shirt

Keep the selection large and rough when creating the chin layer—we will make it blend in nicely later.

Keep the mouth layer selection outside the lip area so there's room to blend it in later.

Likewise, keep the selection around the nose rough, with plenty of room to spare.

Keep the selection around the glasses nice and tight, and include the eyes.

Keep the selection tight around the outside contour of the ear, but give yourself room to work with on the inner side.

Step 3
Just to keep things as flexible as possible, lets transform each layer into a Smart Object. Grab each layer individually and go to Layer > Smart Objects > Convert to Smart Object.

2. Transform and Warp
Now that the different features are all on their own layer, we can begin transforming them into an exaggerated caricature. Use the flexibility of the Smart Objects to work with different size combinations to get a humorous effect.
Step 1
A common caricature technique is to make the head extremely large in proportion to the body. To accomplish this, shrink the body layer down significantly with Edit > Free Transform.

Step 2
Use Edit > Transform > Warp to begin shaping the head layer. Fit the neck into the neckline of the shirt and inflate the top of the head. The goal of this step is just to establish the basic shape of the head, and that serves as a foundation for the other layers to build on.

Step 3
Distort the chin layer to elongate it and sharpen it slightly. Try to keep the top aligned so the seams are not overly visible.

Step 4
Make that big grin even larger by stretching out the mouth layer.

Step 5
Caricatures frequently make noses extremely large and exaggerated. Big noses just look funny! Expand the nose layer to comical proportions—even if it overlaps the mouth, it's OK.

Step 6
The glasses layer requires more attention than the simple scaling we used with the other features. The Edit > Transform > Warp tool can be used to help fit the expanded frames onto his face.

Step 7
All the distortion has nearly eliminated the ear on the base head layer. Good thing we have an ear layer to scale up so that it can support the heft of those glasses!

Step 8
Now add a Layer Mask to each layer and use a soft brush with black paint to blend the individual elements into a cohesive whole.

Masking the chin is the most challenging, as you have to work around the hairs of the beard. Just use a smaller sized brush and work carefully. Here's a shot of the chin layer next to the mask layer used to blend it.

Step 9
Add a new layer above all the cutout layers and use the Spot Healing Brush (J) set to Sample All Layers to paint over any obvious seams or trouble areas that escaped the masking process.

3. Fluid Faces
Next up is the true power behind the caricature process. It's the infamous Liquify feature. We've already done much of the warp work with the different transformations, but it's the Liquify feature that is really going to create a fluid, funny, exaggerated appearance. The Liquify tools are powerful and can be unpredictable, but fortunately the feature supports Smart Filtering, so there's no worries!
Step 1
Select all of the cutout layers and the seam cover layer and merge them into a single Smart Object with Layer > Smart Object > Convert to Smart Object.

Step 2
Go to Filter > Liquify. When the dialogue box comes up, check the Advanced Mode to reveal additional controls.

Step 3
Use the Forward Warp Tool with a brush size around 200 to increase the size of his forehead. Gently push the skin area up towards the hairline.

Step 4
Use the Bloat Tool to click a few times on the tip of his nose to make it look more bulbous.

Step 5
Use the Freeze Mask Tool to highlight the frames of the glasses. This will prevent the frames from distorting while we work with the eyes.

Step 6
Use the Forward Warp Tool again to exaggerate the shape of the temple area, and the Bloat Tool to create a slightly larger shape to the eyes—just be sure to reduce the size of the brush to be similar in size to the eyeballs. When finished, click theNone button in the Mask Options to unfreeze the masked area.

Step 7
Extend the chin a bit more using the Forward Warp Tool and create a more rounded, bulbous end with the Bloat Tool.

Step 8
Finally, make his smile even bigger by using the Forward Warp Tool to push the corners of his mouth up into the folds on his cheeks. Just be careful not to warp the shape of the teeth.

Apply the Liquify effect and your caricature should look something like this.

4. Artistic Background
Now that we've twisted up this poor man's face, let's make it look more like a painted image. We'll start by having a more artistic background.
Step 1
Add a Layer Mask to the caricature layer and use a textured brush to fade the bottom of the layer out. I chose the Sponge Brush Projection brush preset here. Reduce the Brush Opacity setting to around 40% so the texture builds up gradually.

Step 2
Open the BackgroundTexture.jpg file from the tutorial assets and place it as a layer underneath the caricature layer.

Step 3
Add a new layer over the textured background. Use the same textured brush from the mask work to add in a white brushed border effect.

5. Painted Effect
Now we are ready to transform the caricature itself into a painting. We want to retain some of the photographic qualities, but still give the impression of a hand-painted piece. This is easily done using a smudge painting technique.
Step 1
Smaller details tend to disrupt the smudge painting process, so it's best to smooth them out first. Go to Filter > Blur > Smart Blur. Use a Radius of 2.0 a Thresholdof 10.0, with Quality set to High.

Step 2
The highlights in the photo appear a little bright. Correct this by clipping a Curves Adjustment Layer to the caricature layer and using the Curves to decrease the bright areas.

Step 3
Create a new layer at the top of the layer stack. Grab the Smudge Tool with aBrush Size around 40 pixels. Set the Strength to 80% and check the Sample All Layers option. Then begin smudging along the major features of the image. Follow along with the natural grain of the skin to keep the appearance very fluid.

Step 4
Reduce the brush size to about 5 pixels and begin smudging along the smaller details of the image like the eyebrows, individual strands of hair, his eyes, and his teeth.

Step 5
Create a merged layer of the smudge layer, the caricature layer and the adjustment layer by selecting all of them and holding down the Alt key while going to Layer > Merge Layers (Control-E). Then go to Filter > Other High Pass set the Radius to5.0 Pixels. Call this layer Details.

Step 6
Change the Details layer Blending Mode to Overlay, reduce the Opacity to 78%, and then go to Layer > Layer Mask > Hide All. Use a soft, white brush on the mask to reveal the details in the eyes, eyebrows, nose, mouth, and beard.

Step 7
Add a new layer called Dodge/Burn and fill it with 50% gray through the Edit > Fillfeature. Set the Blending Mode to Overlay and then use a soft Black brush at 30% Opacity to simulate a Burn effect. Switch to White to simulate a Dodge effect.

Step 8
Add a final color effect. First create a merged layer of all the layers by holding downAlt while going to Layer > Merge Visible. Then go to Filter > Camera Raw and set the Contrast to +10, Clarity to +22, and the Vibrance to +48.

Done!
And now you are finished! Behold your amazing photo caricature work. Now take these techniques and go apply them to photos of your friends and family to create some fun, unique, and personal portraits!

Want More?
This tutorial is just an excerpt from a larger, more detailed set of instructions found in my Tuts+ course, Fluid Photo Manipulation: Transform, Warp, and Liquify. Also be sure to check out my profile of courses and tutorials here at Tuts+ and find this course, and much more!


.jpg)
0 التعليقات:
إرسال تعليق
عزيزي القارئ إذا كان لديك أي ملاحظات أو تعليقات على الموضوع تفضل بوضعها هنا