

Using patterns with different glow and texture settings can make creating interesting, detailed effects a fun and simple job. This tutorial will show you how to use the duplicate with transformation technique to create a piece of 3D text, and then use a bunch of different layer styles to achieve a glowing metal text effect. Let's get started!
Tutorial Assets
The following assets were used during the production of this tutorial:
- Sans Serif Exb FLF font
- Free Tileable Leather Patterns by WebTreatsETC
- 8 Tileable Metal Textures by WebTreatsETC
- Texture Stainless Steel With Light-deviant by sfishffrog
- Free Pack 6000 photoshop gradients by Supertuts007 (Load theCHROMES.grd and CSP True Sky Gradients.grd files.)
1. Creating the Background
Step 1
Create a new 1260 x 850 px document, and duplicate the Background layer.
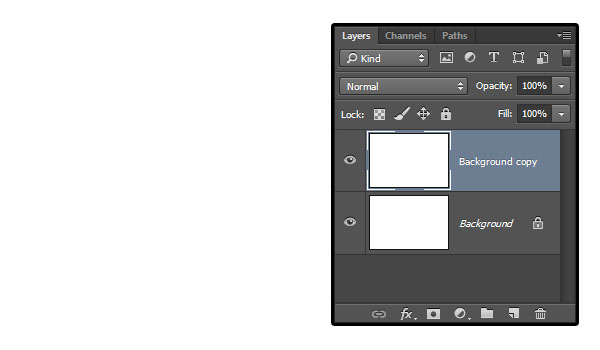
Double click the Background copy layer to apply the following layer style:
Step 2
Add a Gradient Overlay with these settings:
- Check the Dither box
- Blend Mode: Soft Light
- Opacity: 85%
- Style: Radial
- Scale: 150%
- Check the Reverse box
- Click the Gradient box to create the gradient

Step 3
You'll need to click below the Gradient bar to add Color Stops. Then, for eachColor Stop you have, you can click it to select it, and modify its Color and Locationvalues below.
Here are the values used from left to right:
- Color:
#212121, Location: 0 - Color:
#656667, Location: 72 - Color:
#646565, Location: 100

Step 4
Add a Pattern Overlay with these settings:
- Pattern: webtreats_black_leather.jpg

This will style the leather-textured background.

2. Creating the Text and the 3D Extrusion
Step 1
Create the text in All Caps using the font Sans Serif Exb FLF. The Size is 300 pt, the color is
#504d4a, and the Horizontal Scale is 90%.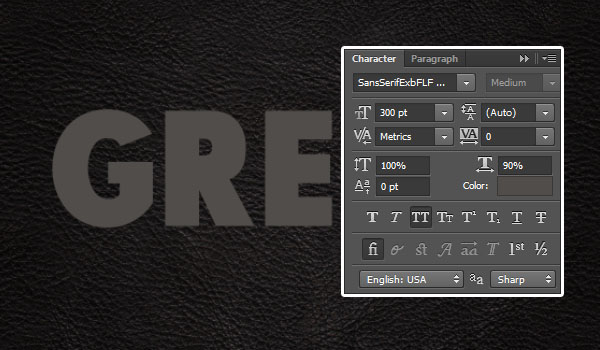
Step 2
Duplicate the text layer, change the copy's Fill value to 0, and duplicate it.

Step 3
Duplicate the original text layer, and drag the copy below it.
Go to Edit > Free Transform (Command-T), and then hit the Right Arrow Keyonce, and the Down Arrow Key once to move the copy layer 1 px to the right and1 px downwards.
Then hit the Return key to accept the changes.

Step 4
Press Option-Command-Shift-T (Alt-Control-Shift-T for Windows) nine times to duplicate the layer with the transformation to create the 3D extrusion.

Step 5
Select all the text layers below the original text layer, and go to Filter > Convert for Smart Filters. Rename the smart object's layer to 3D. Then duplicate it, and change the copy's Fill value to 0.

3. Styling the First 3D Layer
Double click the 3D layer to apply the following layer style:
Step 1
Add a Bevel and Emboss with these settings:
- Technique: Chisel Hard
- Size: 10
- Gloss Contour: Cove - Deep
- Check the Anti-aliased box
- Highlight Mode: Linear Light

Step 2
Add a Contour with these settings:
- Check the Anti-aliased box.

Step 3
Add an Inner Shadow with these settings:
- Distance: 0
- Choke: 10
- Size: 5

Step 4
Add a Gradient Overlay with these settings:
- Use the CSP True Sky Blue gradient fill.

Step 5
Add a Drop Shadow with these settings:
- Distance: 20
- Size: 20

This will style the main 3D layer and add the gradient coloring. Once you're done styling the rest of the layers, you can get back to this one and try different gradient fills if you like.

4. Styling the Copy 3D Layer
Double click the 3D copy layer to apply the following layer style:
Step 1
Add a Bevel and Emboss with these settings:
- Technique: Chisel Hard
- Size: 15
- Uncheck the Use Global Light box
- Angle: 30
- Altitude: 50
- Check the Anti-aliased box
- Highlight Mode - Opacity: 0%
- Shadow Mode - Opacity: 50%

Step 2
Add a Contour with these settings:
- Contour: Cone
- Check the Anti-aliased box.

Step 3
Add an Inner Shadow with these settings:
- Distance: 0
- Choke: 10
- Size: 5

Step 4
Add a Gradient Overlay with these settings:
- Blend Mode: Overlay
- Style: Reflected
- Angle: 60
- Use the faucet 30 gradient fill

Step 5
Add a Pattern Overlay with these settings:
- Blend Mode: Overlay
- Opacity: 90%
- Pattern: metal_2-512px.jpg
- Scale: 75%

This will add more depth and detailing to the 3D part.

5. Styling the Original Text Layer
Double click the original text layer to apply the following layer style:
Step 1
Add a Bevel and Emboss with these settings:
- Size: 14
- Uncheck the Use Global Light box
- Angle: 76
- Altitude: 69
- Check the Anti-aliased box
- Highlight Mode: Vivid Light
- Color:
#ffe1c9

Step 2
Check the Contour box and use the default values.

Step 3
Add a Texture with these settings:
- Pattern: metal_2-512px.jpg
- Depth: 50%

Step 4
Add a Stroke with these settings:
- Size: 2
- Position: Inside
- Blend Mode: Linear Light
- Fill Type: Gradient
- Style: Reflected
- Angle: 90
- Use the stove pipe 50 gradient fill

Step 5
Add an Inner Shadow with these settings:
- Blend Mode: Color Burn
- Color:
#123c6b - Opacity: 55%
- Distance: 0
- Size: 60
- Contour: Cove - Deep
- Check the Anti-aliased box

Step 6
Add an Inner Glow with these settings:
- Blend Mode: Vivid Light
- Noise: 15%
- Color:
#f4d9c0 - Size: 14

Step 7
Add a Satin with these settings:
- Blend Mode: Color Dodge
- Color:
#9a9a9a - Distance: 48
- Size: 39
- Contour: Cone - Asymmetrical

Step 8
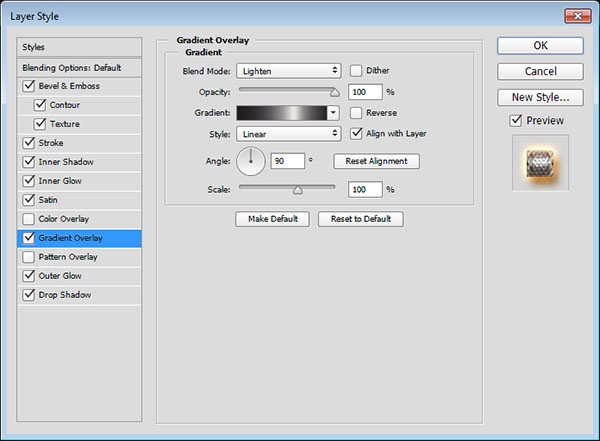
Add a Gradient Overlay with these settings:
- Blend Mode: Lighten
- Use the stove pipe 100 gradient fill
Step 9
Add an Outer Glow with these settings:
- Blend Mode: Vivid Light
- Noise: 10%
- Color:
#c6ab6a - Size: 35

Step 10
Add a Drop Shadow with these settings:
- Color:
#8d5411 - Distance: 10
- Size: 10

This will style the main text.

6. Styling the First Copy Text Layer
Double click the first copy text layer to apply the following layer style:
Step 1
Add a Bevel and Emboss with these settings:
- Size: 1
- Check the Anti-aliased box
- Highlight Mode: Vivid Light
- Shadow Mode: Color Burn
- Color:
#74460f

Step 2
Add a Contour with these settings:
- Contour: Rounded Steps
- Check the Anti-aliased box

Step 3
Add an Inner Glow with these settings:
- Blend Mode: Vivid Light
- Noise: 30%
- Color:
#f3d8aa - Source: Center
- Size: 62

This will intensify the glowing effect in the center of the text.

7. Styling the Second Copy Text Layer
Double click the second copy text layer to apply an Inner Glow effect with these settings:
- Blend Mode: Vivid Light
- Opacity: 55%
- Noise: 30%
- Color:
#d5ad89 - Size: 14

This will intensify the glowing effect at the edges.

8. Adding the Background Texture Image and Adjusting the Coloring of the Final Result
Step 1
Place the Texture Stainless Steel With Light-deviant image on top of theBackground copy layer, resize it as needed, then change its layer's Blend Mode toSoft Light.

Step 2
Click the Create new fill or adjustment layer icon at the bottom of the Layerspanel and choose Color Balance.
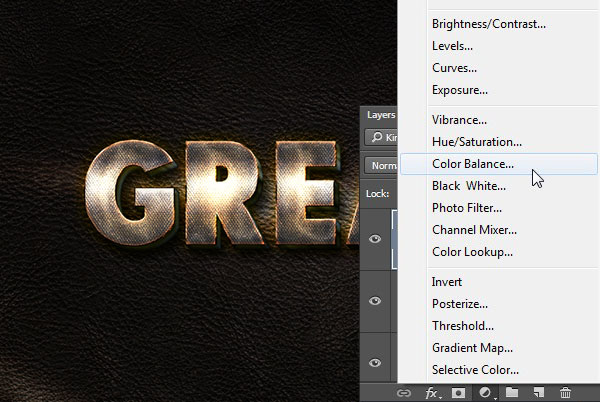
Step 3
With the Tone option set to Midtones, change the values to -35, -1, +10, and check the Preserve Luminosity box.

Congratulations! You're Done
In this tutorial, we created a simple leather background, and added a couple of copies of the text we're working on.
Then we copied the text with a transformation to create the 3D part, and converted it into a smart object.
After that, we styled all the layers we have, to achieve the textured, glowing effect, using a bunch of different layer styles with different settings and values.
Finally, we added a simple texture to the Background, and used a Color Balance adjustment layer to enhance the coloring of the final result.
Please feel free to leave your comments, suggestions, and outcomes below.


0 التعليقات:
إرسال تعليق
عزيزي القارئ إذا كان لديك أي ملاحظات أو تعليقات على الموضوع تفضل بوضعها هنا